STAGE AND STUDIO MODES
You can make AMPX as complex - or as simple - as you like! Want to create your sounds and then focus fully on your playing onstage? Then use AMPX in Stage Mode! In this mode, you keep the flap closed. Then Bass, Middle, Treble and Presence controls act as a post EQ - and thus act as a Master EQ on all presets. This means you can adjust all of your pre-created presets in a second.
On the lower control panel in Stage Mode, you also have access to the Master Volume as well as your favorite amps assigned to CLEAN, VINTAGE, CLASSIC, MODERN, gain and volume for the active amp, and ON/OFF controls for the selected boost, drive, modulation, delay and reverb pedals.
If you want more control, open the flap and engage Studio Mode! This gives you access to AMPX’s second control panel, where you can program each of your sounds and presets to your heart’s content. Note that when you’re in Studio Mode, the tone control knobs correspond to those of the selected amp. Here, the tone control is a central component of each individual amplifier, and it is modelled on the original amp.
Foot switches
AMPX also has a freely assignable footswitch concept, which allows you to save and recall up to two presets per switch, and freely assign switching (e.g. pedal On/Off switches) and control functions. If you need more switches, you can do this by using a BluGuitar REMOTE or an external MIDI controller, and these will also be part of your programmable rig.
Presets
The first preset (blue) is activated with the first hit on a footswitch. If you hit that footswitch again, you will access the second preset on the same footswich. Hitting the same footswitch again, you recall the second preset (purple).
Custom functions
Put our most important functions such as solo volume, your favorite boost pedal or any kind of function to any of the foot switches.

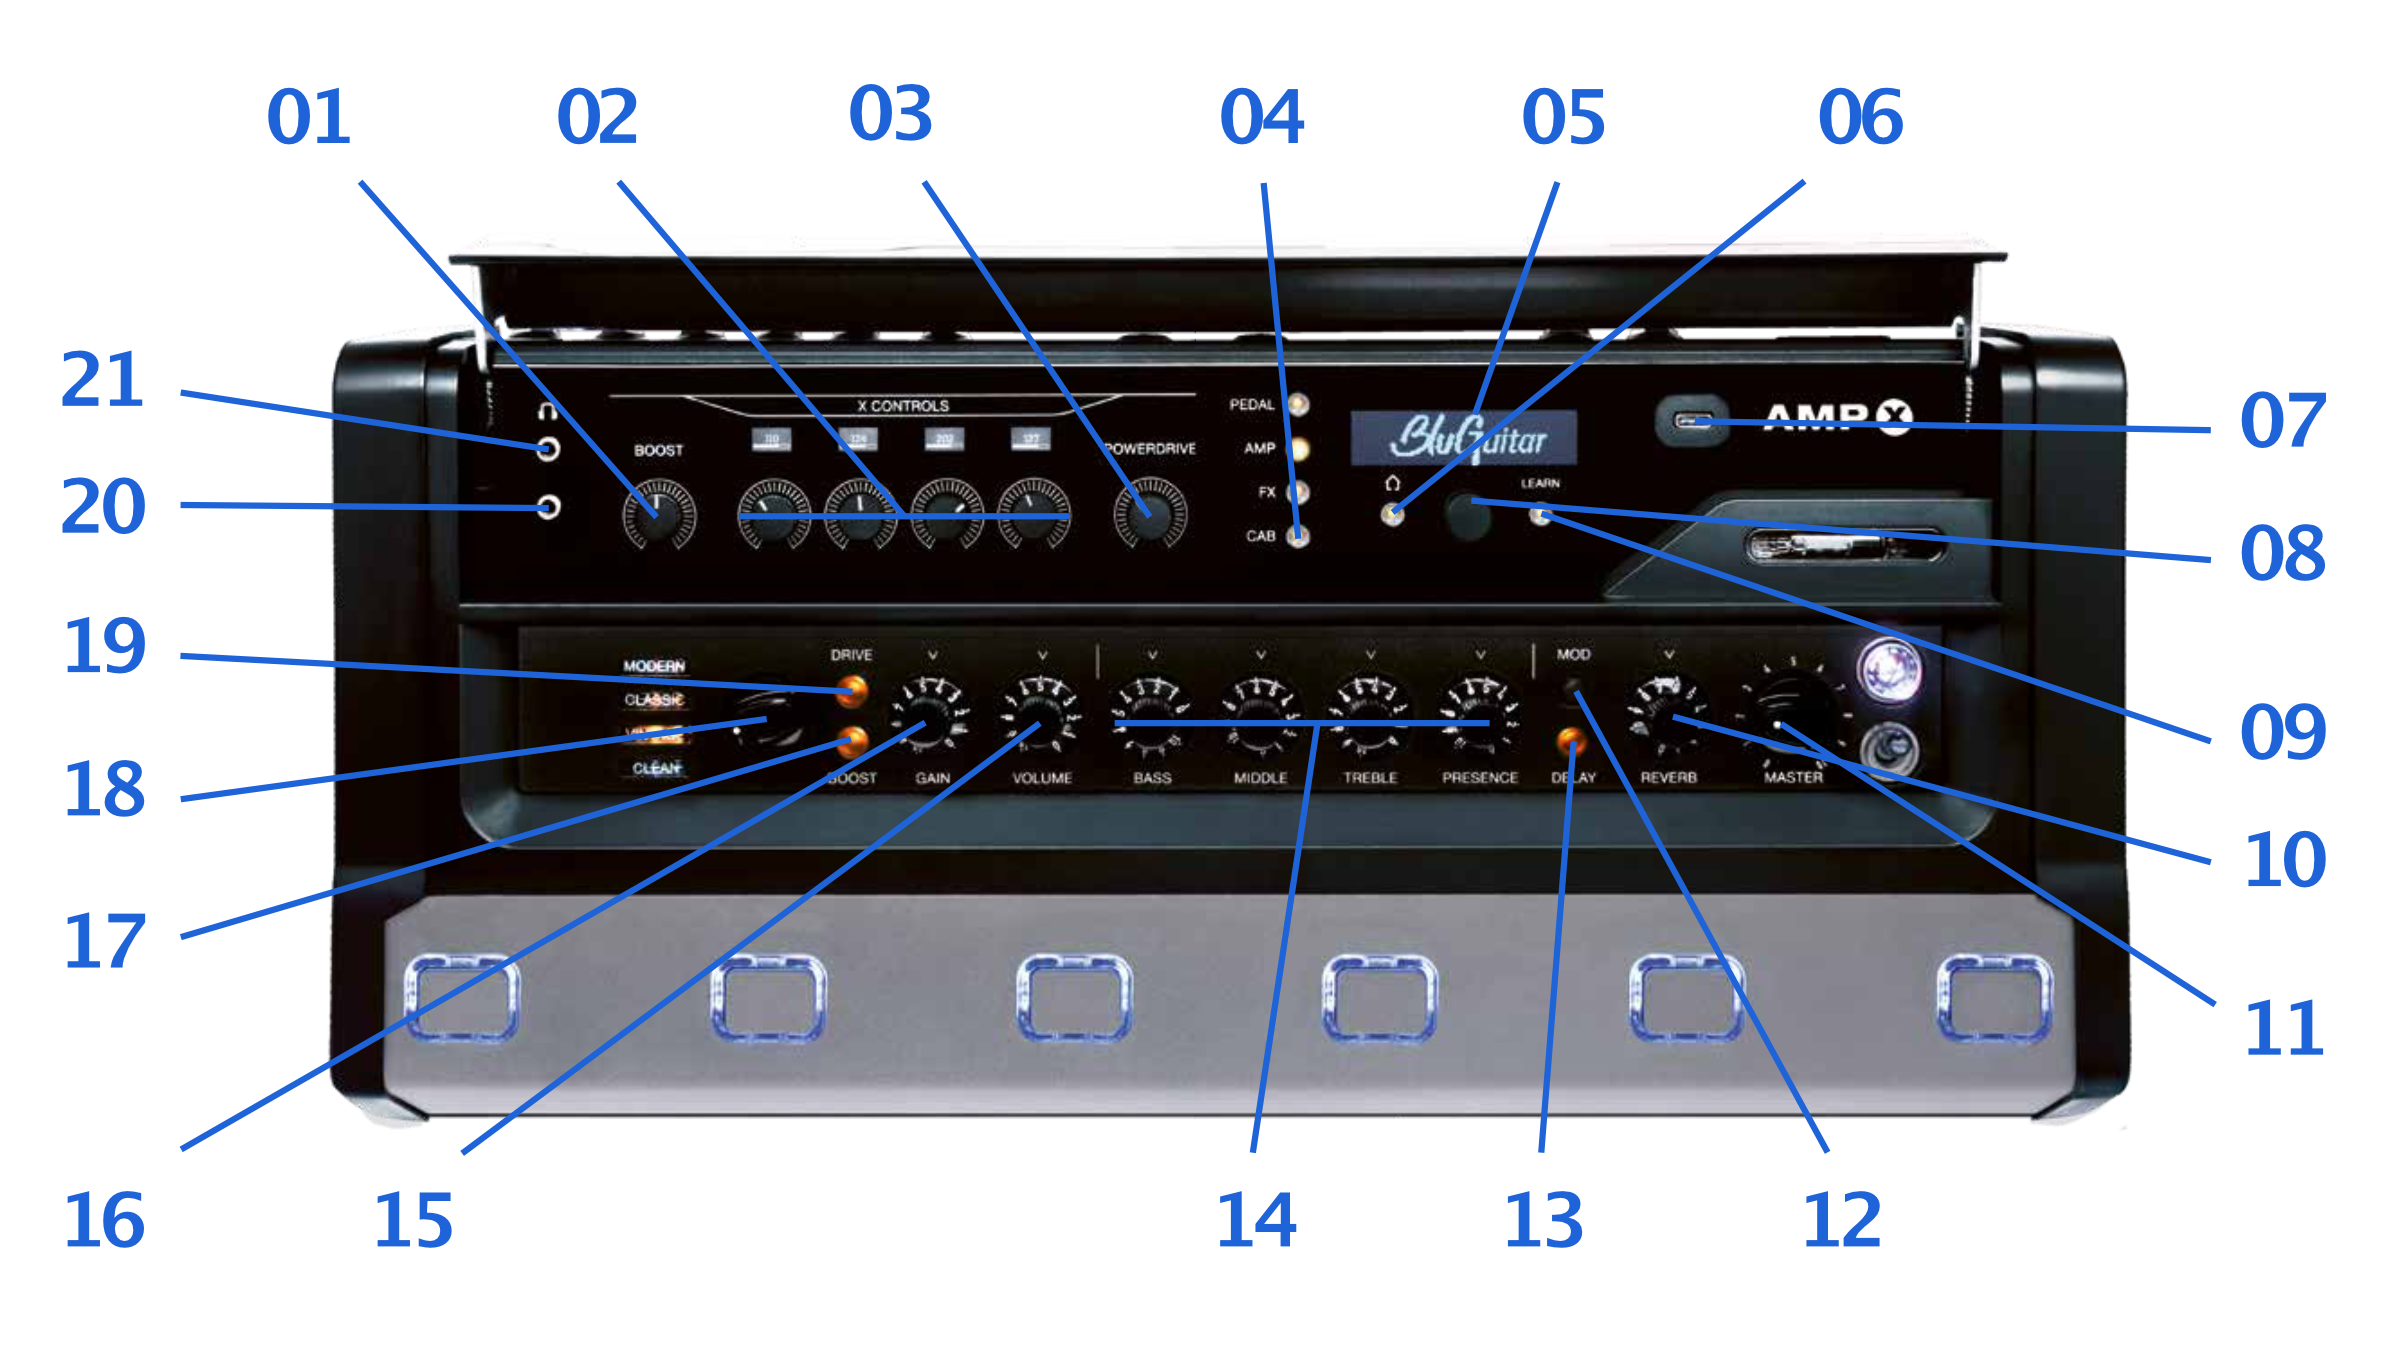
01 - BOOST |
Controls the level of your chosen Boost pedal in front of the amp. |
02 - X CONTROLS |
Control the parameters of your chosen FX - the parameters are indicated in the displays above each knob. |
03 - POWER DRIVE |
Turn it up to get a cranked sound of your chosen amp model without changing the volume. |
04 - PEDAL/AMP/FX/CAB BUTTON |
Push to navigate to your chosen section of the AMPX. |
05 - OLED DISPLAY |
Always shows you what's in focus. |
06 - ‘HOME’ BUTTON |
Takes you home to your currently selected preset. |
07 - USB PORT |
Connect the AMPX to your computer or a USB stick. |
08 - PUSH DIAL |
Set and select parameters. |
09 - LEARN BUTTON |
Save your settings. |
10 - REVERB CONTROL |
Select your reverb. |
11 - MASTER |
Controls the overall output level of your AMPX. |
12 - MOD BUTTON |
Switches the chosen MODULATION ON/OFF. |
13 - DELAY BUTTON |
Switches the chosen DELAY ON/OFF. |
14 - BASS/MIDDLE/TREBLE/ |
These four EQ knobs control your tone. |
15 - VOLUME |
Volume of the currently selected amp. Note that the overall level of your AMPX should be controlled via the Master knob. |
16 - GAIN |
More gain = more saturation! |
17 - BOOST BUTTON |
Switches the chosen BOOST ON/OFF. |
18 - SELECT FAVORITE AMP |
CLEAN, VINTAGE, CLASSIC, MODERN |
19 - DRIVE BUTTON |
Switches the chosen DRIVE pedal ON/OFF. |
20 - AUX IN |
Connect external signals like MP3 players here. |
21 - HEADPHONES OUT |
Connect your headphones here. |
TUNER |
To access the built-in tuner, hold down the two right-hand foot switches for three seconds. |
| Previous: Congratulations on your new AMPX! | Next: The AMPX back panel |